Abstract
This article aims to record how to install Ubuntu 16.04.6 with Windows 10.
Note: Though this is for Ubuntu 16.04.6, it may still adapt to the similar version like Ubuntu 18.04.
Attention: Please follow each step during the installation, or the boot file may be damaged and caused Windows system cannot be accessed as well!!!
Requirement
- ISO mirror of Ubuntu 16.04.6, download from https://ubuntu.com.
- An USB drive with at least 4 GB storage and no data in it.
- Rufus, a software to burn the mirror to USB drive.
- 70 GB continue free space on the disk(the space is depended on the requirement, but the advice is at least 40 GB).
- Diskgenious, if you had another version of ubuntu and want to delete it.
Step 1. Burn mirrors to the USB drive
Open the Rufus, choose the USB device and select the ISO mirror of Ubuntu 16.04.6. Choose the GPT format, UEFI, and keep other parameters as default. Then, press start to burn mirror.
Attention: This operation will format the USB drive, please backup before the operating.
Step 2. Partition space on the disk for Ubuntu 16.04.6
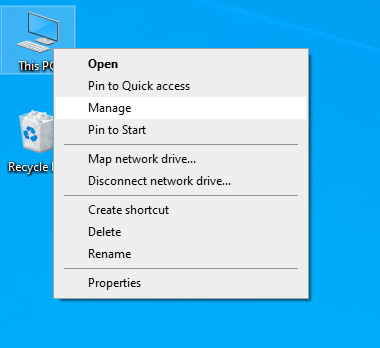
Open the Manage->Disk Management on Windows 10:
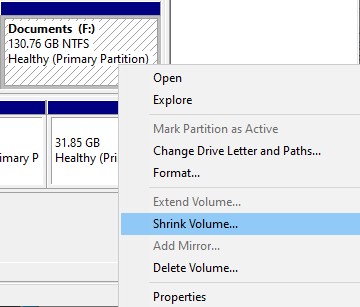
Shrink 70 GB from a disk partition to install Ubuntu:
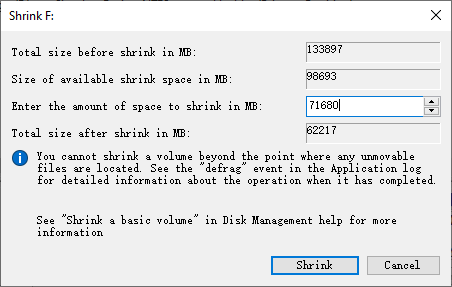
Then there will be 70 GB unallocated space.

If a version of ubuntu has been installed before and you want to delete it, choose the partition for it and select delete:

Run Diskgenious and delete the installed grub boot in ESP partition , delete the ESP/EFI/ubuntu

Step 3. Install Ubuntu
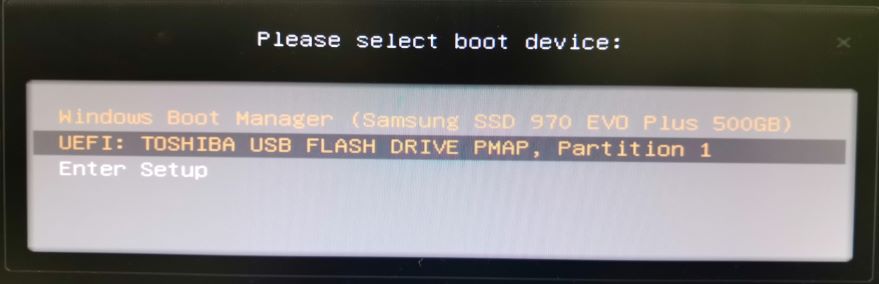
Reboot and enter BIOS startup option when booting. For MSI BIOS, press F11 when in logo interface, and boot from the USB drive:
Then, choose Install Ubuntu and start the install guide.
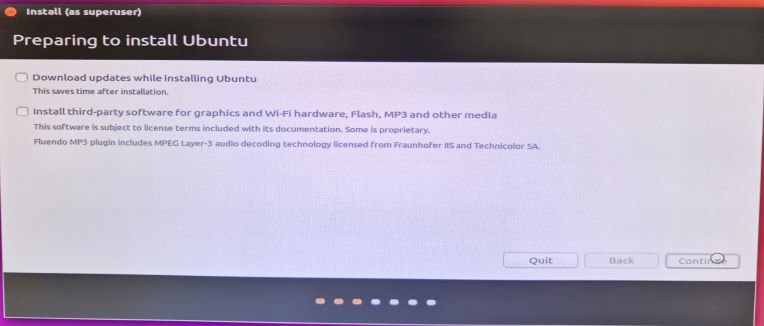
In this interface, DON’T download updates or install third-part software, it can slow down the installation and have a high probability causing display error after installation!!!
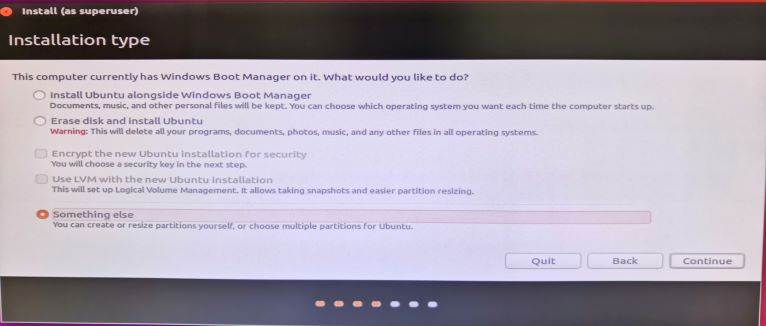
Choose “Something else” option to manually configuring partitions:
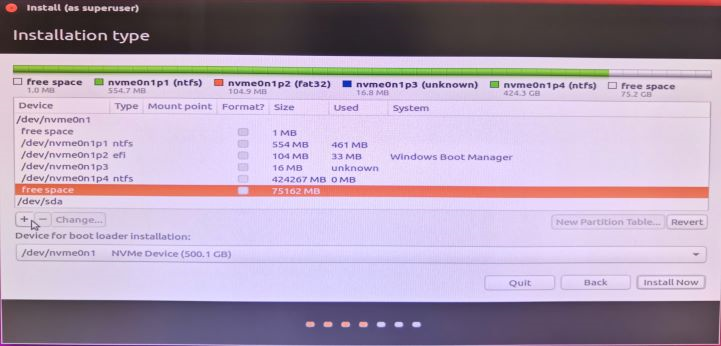
Choose the free 70 GB space unallocated, and click “+” to add new partition:
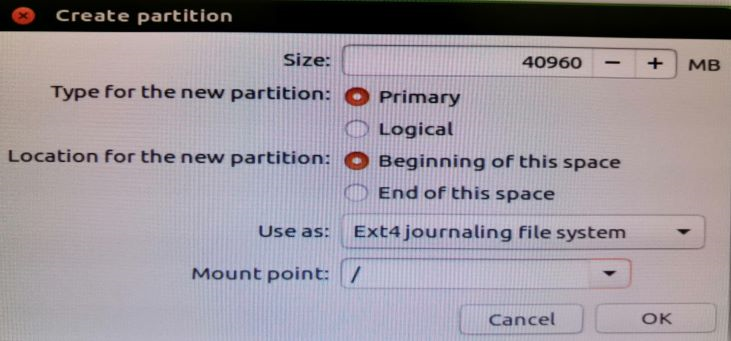
The first partition is for root with 40 GB, with following settings:
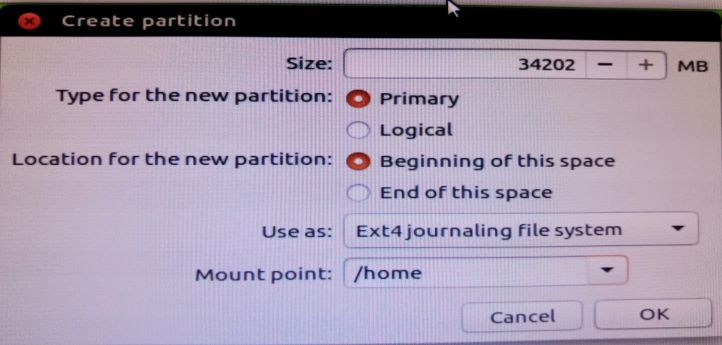
And then add a new partition for /home with about 30 GB, with following settings:
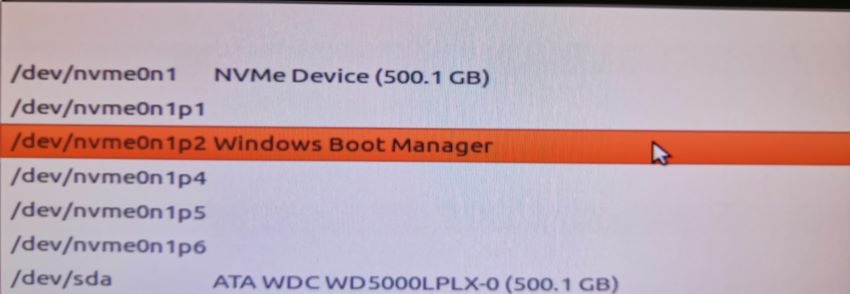
Then, choose the install partition of grub boot to the same partition with Windows Boot Manager:
Install now, it will notice like this, choose to continue:
Attention: It will format these two partitions, please make sure choose the correct partition when building partition table and make sure nothing data in these parts, or the data will lose!!!

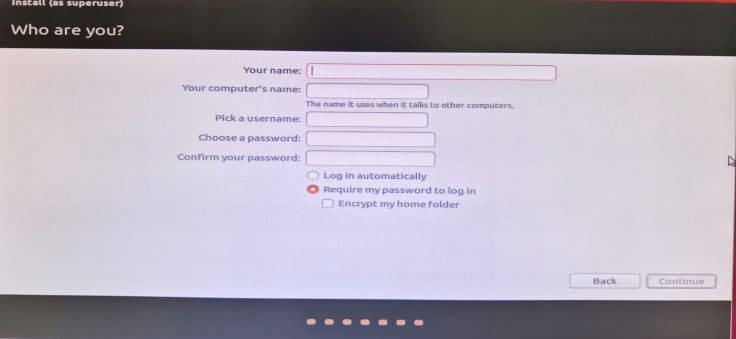
Choose the location and keyboard layout, and then create a new user:
Then, just wait for the installation finished and restart.
Step 4. Start up Ubuntu
Normally, it will boot with grub automatically and just choose ubuntu to start up the system. However, if the boot still boot to Windows 10 automatically, the boot order is required to be edit in BIOS settings.
Take MSI BIOS as an example, enter the BIOS settings when the PC is booting(press “delete”), and move to the “Boot” option. Select the “UEFI Hard Disk Drive BBS Priorities” option:
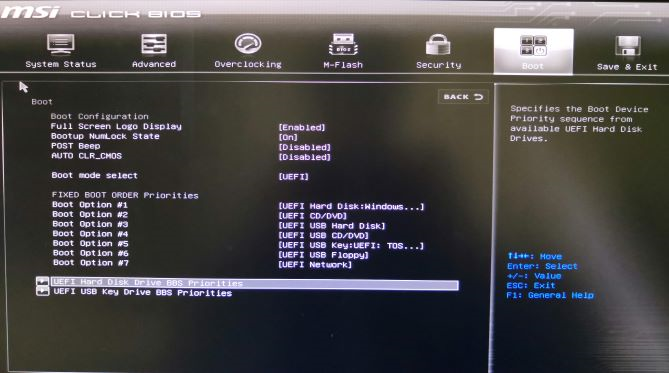
Change the “Boot Option #1” to ubuntu:
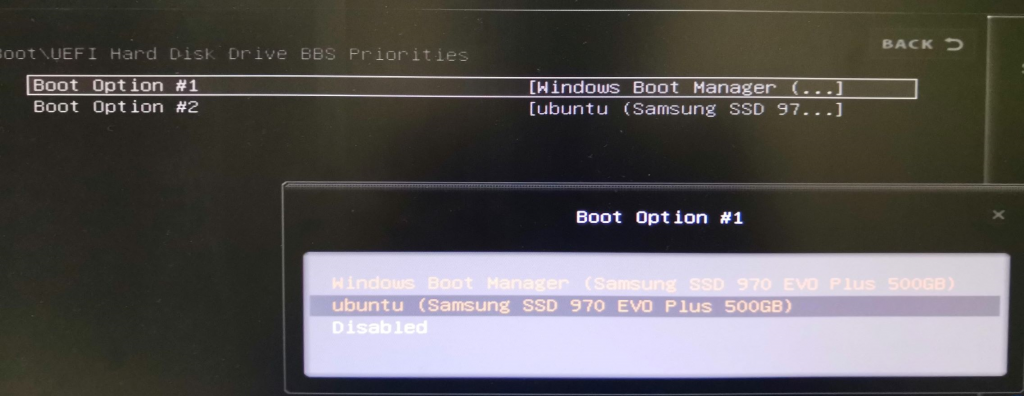
Then save and reboot, it can boot to Ubuntu successfully.
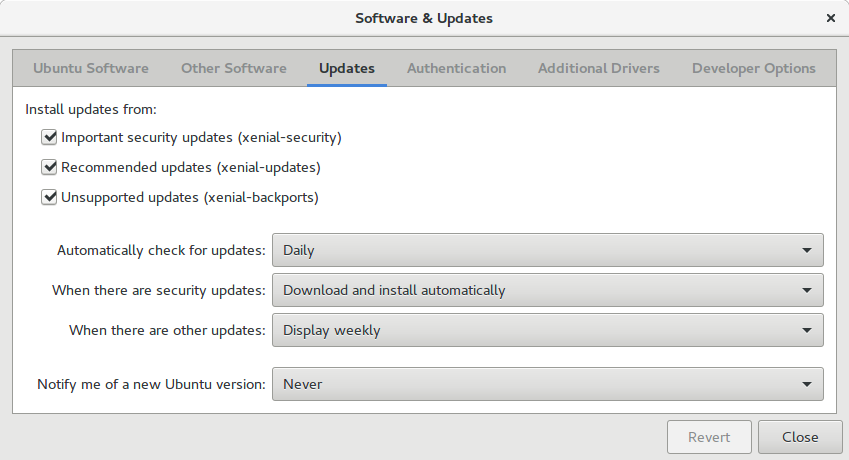
Step 5. Update settings
To keep using current version of ubuntu, we need to update software & updates settings as following settings:
Then, run following contents in terminal:
# The content with # is a comment, don't run it in terminal
# Check update in source
sudo apt update
# Update packages in the system
sudo apt upgrade