Abstract
This article aims at introducing how to use Git and Github to manage different version and branch of a project. An example of creating a project with Git will be given and explain how it can be managed by Git and push to Github. We will take Linux system as example, for Windows can use Git Bash instead.
Part 1. Use Git
What is Git?
Git is an open source distributed version control system that handles project versioning from small to very large projects efficiently and quickly. With git, a project can be easily developed by more developers with different branches, which is helpful to improve development of a large project. Besides, it allows developer to manage different versions of a project, helping developer to keep track of the process and recover to a stable version in the situation of unexpected events.
First time configuration
User name and Email
Configure user name and email, which will be used in each commit:
$ git config --global user.name "username"
$ git config --global user.email [email protected]
Create a new Git project
Assume that a project will be named as “hello_world” and placed in the home path ~/.
First, create a new folder called “hello_world”, which will be used as project workspace:
~$ mkdir hello_worldThen, go to the workspace and initialize the repository with following command:
~$ cd hello_world
~/hello_world$ git init
Create a README.md file:
~/hello_world$ touch README.mdWorkflow
The repository consists of three trees. The first is Working dir, which holds the actual files. The second is Index, which act as a staging area. The third is HEAD, which points to the latest commit.
Once the files in Working dir changes, the changed parts are required to add to stage area before commit. When you commit, all the changes in stage area will be submit to the HEAD, and the stage area will become cleaned.

Add and Commit
Add changes to Index by the following command:
~/hello_world$ git add <filename>For convenience, we can add all the changes in the workspace with command below:
~/hello_world$ git add .To commit all changes from Index to HEAD, run command below:
~/hello_world$ git commit -m "Commit message"Now the latest version of project has been commit to HEAD.
Part 2. Use Github
What is Github?
Github is a global company that provides hosting for software development version control using Git. With Github, the code can be pushed online and developed by more developer. Besides, it is also a famous open source code platform.
Sign up on Github
Go to the official website of Github to sign up: https://github.com/
Create a new repository on Github
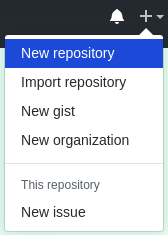
Step 1. Choose in the menu
Choose “New Repository” option in the add menu:
Step 2. Complete repository options
Complete the repository name, description and privacy option:
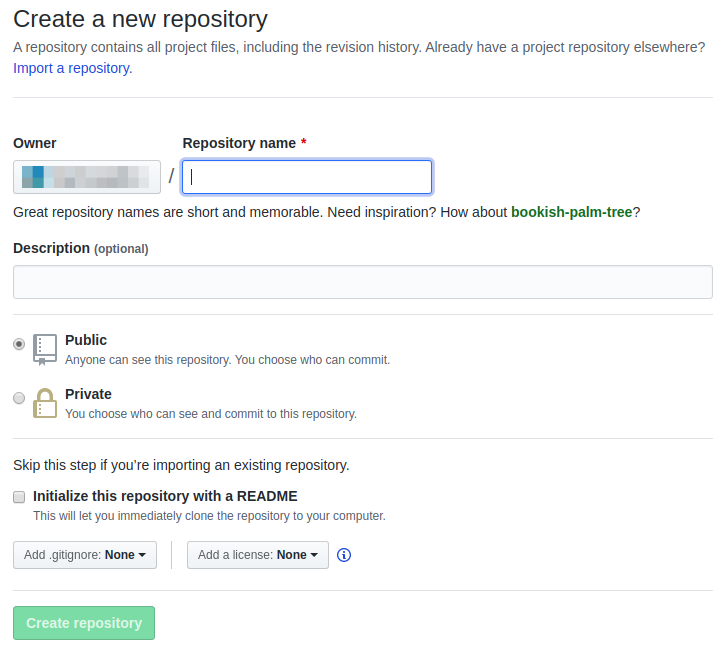
Note: For free account, you can only create public repository. However, if you are a student, you can apply student account and create private repository free.
If you want to push a exist local repository to this repository later, do not choose “Initialize this repository with a README”.
Allow your computer to access your Github account
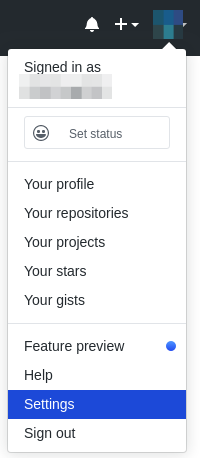
Step 1. Edit settings of your account
Choose “Settings” in the menu of the account:
Step 2. Click “SSH and GPG keys” option
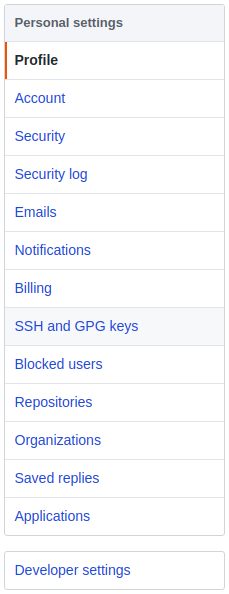
Step 3. Click “New SSH key” option

Step 4. Generate SSH key of your computer
Generate SSH key of your computer in terminal(mac and linux) or git bash(Windows) with command below:
~$ ssh-keygen -t rsa -C "[email protected]"The email address is the email which you used to sign up for Github.
Then, a file “id_rsa.pub” will be generated in the path that feedback in the terminal, usually is ~/.ssh.
Step 5. Copy all text in id_rsa.pub to your Github keys list
Add a title for this key and copy the SSH key(all text in id_rsa.pub) to the page below:
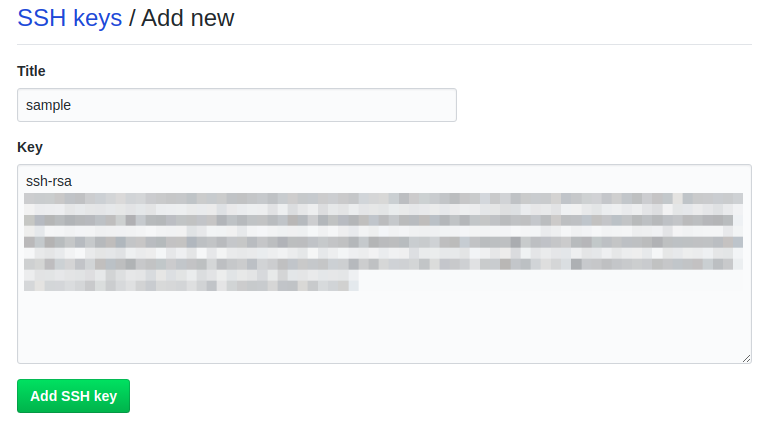
The SSH key usual start with “ssh-rsa” and end with your email.
Then you can see the added SSH key in the list.
Push a local repository to github repository
Add remote repository for local repository
Add the repository on Github as remote repository of local repository:
~/hello_world$ git remote add origin [email protected]:<username>/hello_world.gitThe address can also be found on your github repository:

Push the local repository to remote repository
Push with command below:
~/hello_world$ git push -u origin masterBranch
Branches are used to develop features isolated from each other. The default is “master”, which is created when you create the repository. You can create a new branch and develop new features in it. When developed, you can merge it to the main branch “master”.
Create a new branch
Create a new branch and switch to it:
~/hello_world$ git checkout -b <branch_name>List all branches
~/hello_world$ git branchAll the branches will be list, and the branch with a “*” before its name is the current branch.
Switch to a branch
~/hello_world$ git checkout <branch_name>Delete a branch
~/hello_world$ git branch -d <branch_name>Push a branch to Github repository
~/hello_world$ git push -u origin <branch_name>Update local repository from Github repository
~/hello_world$ git pullMerge
Different branches can be merged with each other. The command below can merge a branch into current branch:
~/hello_world$ git merge <branch_name>If you want to merge a branch to the master branch, please switch to the master branch first and then merge:
~/hello_world$ git checkout master
~/hello_world$ git merge <branch_name>